By Jim Buckley
Masonry ovens have been built in American homes since the first colonists landed in New England in the 17th century and before that when the Spanish settled in Florida and the Southwest in the 16th century. Surprisingly there weren’t many differences between the ovens built in New England and the ones the Spanish built because oven traditions date back much farther – to at least Roman times.
The difference in New England and in other colder climates was that the ovens, instead of being out doors and built of stone or adobe, were usually built inside and built with brick and usually associated with cooking fireplaces. Beyond that there was great variety. I have poked my head into many old ovens and read what I could find on the subject and came to the conclusion that building a masonry oven was an “imprecise science” in the words of Peter Rose who wrote one of the best articles, “Baking in a Beehive” published in 1985 in Americana. Apparently masonry ovens are fairly forgiving and/or the cooks didn’t complain much and were able to adjust to what must have been very different firing procedures and firing times from one oven to the next.
The ovens discussed here are called “black ovens” which means the fire is in the same oven chamber where the food is cooked. Smaller ovens are “periodic” ovens in that after the oven is hot and the fire out, the ashes are swept out and the oven floor damp mopped before the food is cooked. Larger commercial ovens might be fired continuously with the fire pushed to one side or the back to make room for the food. There are “white ovens” which are heated by a fire below the oven or by flue gasses in passageways around the oven as in some masonry heaters, but white ovens are difficult to build so that they get hot enough and are not very common.
The “rules” for black ovens as well as I can figure out are:
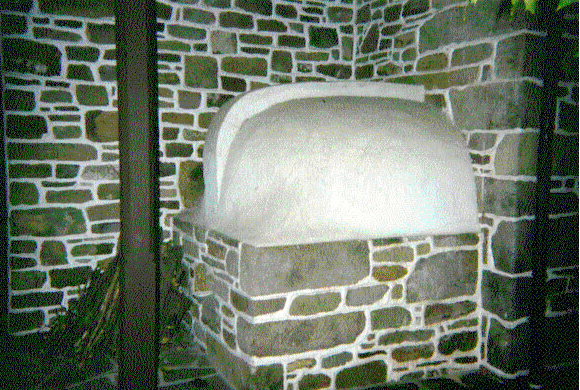
The shape of the oven is ideally like that of an Eskimo igloo – semi-spherical with a tunnel entrance – although many ovens are arched vaults or even square.
The oven has to be at least 16″ in diameter inside to be useful.
The flue, if there is one, is just inside the oven door or entrance and must be at least two thirds as high as the top of the dome of the oven.
The walls must not be too thin (the oven will not stay hot very long) nor too thick (the oven will take too long to get hot). I figure the walls should be about 8″ thick and kept at least 2″ away from combustible materials to comply with modern building codes for fireplace fireboxes. If the oven walls are within a more massive chimney structure, I insulate between the 8″ oven walls and the rest of the masonry. Otherwise the oven never heats up.
 Early American ovens built before 1760 were usually built into the back of big cooking fireplaces. This one, built about 1720 outside a Bucks County, PA roadhouse is about six feet in diameter with the entrance in the back of a twelve foot wide fireplace on the other side of the wall. Notice the “squirrel tail” or “Mohawk” flue passageway over the top of the oven and venting into the fireplace just above the oven entrance which was probably an ingenious way to get the oven to heat more evenly and draw better.
This style was typical in Colonial America. After about 1760 ovens were built to one side of the cooking fireplace more like the one at the top of the page, rather than in the fireback, probably because so many cooks caught their hair or clothing on fire reaching over the fire to use the oven.
One of the most interesting fireplaces and ovens I’ve ever seen is in the fully restored kitchen in the Governor’s House at Williamsburg, VA.
Notice the oven behind the cook to the left of the fireplace and the “set pot” just inside the fireplace on the left side and the spits that work by weights and a clockworks-like mechanism to automate the cooking process. This was high tech in 1760!
The cooking fireplace and bread oven pictured (left) was built in 1990 and is a pretty good reproduction of a Williamsburg style working fireplace circa 1760 except that the fireplace is a Rumford. The style of the fireplace, of course, predates Count Rumford but there were many of these workhorses built in summer kitchens all over the east and midwest up through about 1850, often coexisting with Rumford fireplaces in the main house. The Rumfords were for heat but you didn’t necessarily want the fireplace you cooked on to heat – not in the summer anyway.
These days when we build an early American cooking fireplace it is generally in the “great room”, not the summer kitchen, and the man of the house is cooking, not the servants. So we make some compromises. This fireplace is a five foot wide, four foot tall Rumford fireplace and has an efficient rounded throat and smaller flue than its 1760 ancestor would have had so it won’t be too inefficient.
You might have noticed the red brick firebox. It’s regular solid facebrick (no cores) laid in regular Portland cement mortar. They didn’t have firebrick in 1760 and my customer didn’t like that “ugly yellow firebrick”. I told him facebrick couldn’t take the thermal shock and would crack and spall, but I couldn’t convince him. A year after I built the fireplace he called to tell me how much he enjoyed the fireplace and oven. He said five of the brick in the fireback had cracked and the face had spalled off another one. “It’s great”, he said. “The fireplace is only a year old and it already looks as if it’s 200 years old.” Another sort of customer would have had me back out to replace brick six times.
The oven next to this fireplace, was built using the components shown below made by the Superior Clay Corporation, and is shaped like an Eskimo igloo 24″ in diameter. There is a chute at the oven floor level leading to a loose brick in the main fireplace coving. With the loose brick removed this passage way is used for combustion air intake and an ash dump. The 6″ round flue is in the entrance tunnel between a cast iron Dutch Oven door and a wooden inner door, or plug.
24″ Oven Components, courtesy Superior Clay Corp.
In this small periodic oven the fire is built inside the oven to bring it up to temperature and then it is used for baking, cooking and warming all day long until it has cooled down.
To use the oven remove the loose brick, for combustion air, and the wooden inner door. Build a wood fire in the oven. After the fire has burned out sweep the ashes through the ash shoot into the main fireplace, replace the loose brick, put whatever is to be cooked in the oven, seal the oven off from the flue with the inner wooden door, and close the Dutch oven door.
It works OK but the oven is too small and too tall. We designed it around the Vestal cast iron “Dutch Oven Door” that we liked but that was the wrong size. For this kind of oven the door should be wider and not so tall.
New Ovens. Now that we’ve designed and built more ovens we make our ovens bigger and lower with wider more accessible entrances. Instead of a door we use a simple steel or clay plate with a couple of legs and a handle to set in front of the opening. Push it in a little and it also blocks the flue. No Dutch Oven door and no inner wooden door necessary. The new 36″ oven is large enough to keep a fire in it while cooking.


